Today we have a lesson in how not to treat the stamp cutting mat.
I was concerned that the previous cuts had gone off the edge of the material sometimes. I got the "brilliant" idea to cut a piece of cardstock the same size as the stamp material and to cut that as a test before using the stamp material again. That is, with the stamp material design page setting but cardstock cut settings.
Well I did that and measured it up. My Silhouette Portrait machine cuts 7mm further to the left than it should. I can allow for that when laying out the cuts in future. Exactly why I don't know, maybe a software bug? I would be interested to here if others have the same problem...
But when I wanted to remove the card from the mat there was trouble, the card tore into layers instead of peeling off. The mat adhesive was too strong. I worked at it for a while then decided I would have to replace the mat. Scraping too hard just removed the layer of adhesive from the mat. My DH suggested soaking the paper off in warm water, as I was resigned to losing the mat anyway I tried it. My childhood stamp collecting experience came in useful here. Yes I am that old. Well the mess came off easily in warm water. And when the mat dried off it still worked! Not perfectly, I think, because I had damaged the adhesive - I cut a full sheet of flower shapes and one petal didn't cut right. Also a couple of small bits of material came off during cutting, they seem to have fouled the blade because half of the flower they came out of wasn't cut. Looks like I will get that replacement mat. In the meantime I will try increasing the cut depth a teensy bit.
Monday, 22 February 2016

Wednesday, 17 February 2016
Silhouette Stamp Material and Candles
I trid a technique from a magazine, where you build up layers of UTEE (Ultra-Thick Embossing Enamel) and then stamp in it while it is hot. The magazine suggested not using a clear stamp because it could melt. Well the stamp material stamp worked fine, and didn't melt, I stamped so deeply it came off the block and I had to peel it out of the UTEE. The effect was a bit disappointing and won't show up in a photo very well.
I think the stamp material is pretty heat resistant so I decided to try it out with molten candle wax. Now if you search the internet for stamping or embossing on candles, you get info on how to attach bits of stamped tissue paper onto candles. Who knows what chemicals are in the smoke if it burns down to the paper?
What I did was to melt a flat piece of candle with my craft heat gun and press the stamp into it. The stamp again came off the block but was easily peeled off. I got a deep impression as the wax came up through the holes in the design. So you can get a customised design on a candle without adding anything that might affect its safety. You can do this with bought stamps of course but it might be hard to clean any wax out of the indentations.
My next step will be to try attaching the stamp onto the inside of a metal candle mould and make a candle in the mould. If the stamp pieces come off the mould as the candle shrinks, it would work, I think. The stamp material stamp will curve so I think it could be used in the inside of a soft drink can. Its possible to cut open the can mould to get the candle out, especially if you use a thin cheap one.
I think the stamp material is pretty heat resistant so I decided to try it out with molten candle wax. Now if you search the internet for stamping or embossing on candles, you get info on how to attach bits of stamped tissue paper onto candles. Who knows what chemicals are in the smoke if it burns down to the paper?
What I did was to melt a flat piece of candle with my craft heat gun and press the stamp into it. The stamp again came off the block but was easily peeled off. I got a deep impression as the wax came up through the holes in the design. So you can get a customised design on a candle without adding anything that might affect its safety. You can do this with bought stamps of course but it might be hard to clean any wax out of the indentations.
My next step will be to try attaching the stamp onto the inside of a metal candle mould and make a candle in the mould. If the stamp pieces come off the mould as the candle shrinks, it would work, I think. The stamp material stamp will curve so I think it could be used in the inside of a soft drink can. Its possible to cut open the can mould to get the candle out, especially if you use a thin cheap one.
more samples of Silhouette Stamp Material stamps with various stamp pads available in Australia
 |
| Brilliance stamped with an acrylic stamp |
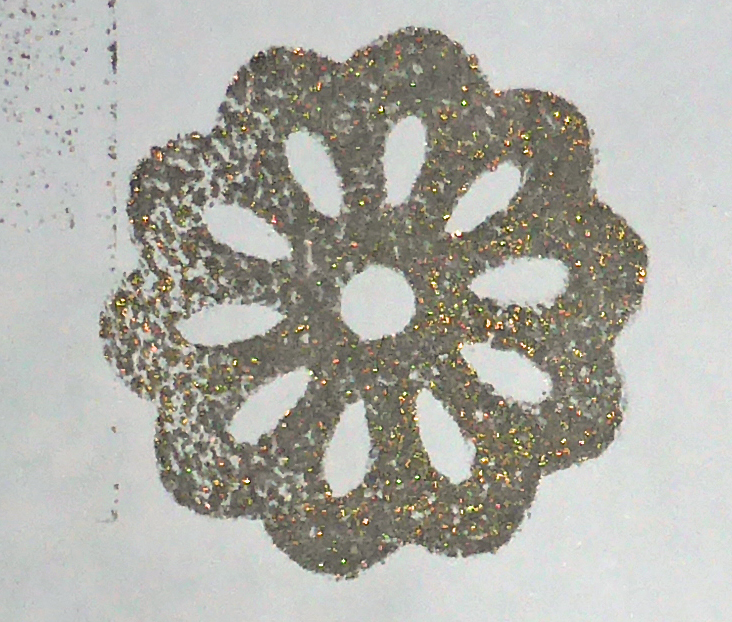 |
| Brilliance Pigment Ink stamped with the Stamp Material |
 |
| Embossed with Zing |
Update: I got a different colour of the same ink and it didn't have that problem.
 |
| Riot Art and Craft Chalk Ink |
Last we have Tsukineko Water Soluble Pigment Ink in Serenade. I bought this years ago but it still works. By years ago I mean at least ten years, possibly many, many more.
 |
| old but still working Tsukineko Serenade |
Friday, 22 January 2016
tests of Silhouette stamp material stamps with various stamp pads
 |
| wounded stamp |
 |
| black ink from Starter Kit |
*** Update - the Sharpie was a bad idea - the stamp kept some red colour which then came off on my embossing ink pad.
 |
| brand new Versacolor cube |
 |
| red Sharpie marker |
 |
| Distress ink pine |
Tuesday, 19 January 2016
The flower on the box of the Silhouette Stamping Starter Kit
 I made the flower which features on the box. I didn't resize it - it came out larger than the largest acrylic block supplied with the kit. As mentioned it went off the edge of the stamp material as well, you can see the missing bit on the top right-hand corner. The stamp has some of the black ink left on it so you can see it. there is actually another stamp on the back of the block in the picture but it barely shows up. The flower stamp is in one piece but the one on the back is in many small bits so I didn't want to remove it just yet.
Monday, 18 January 2016
making a stamp with Silhouette's stamp material on my Silhouette Portrait machine
I have a Silhouette Portrait cutting machine and the Silhouette Stamping Starter Kit. I couldn't fine much info on what stamp pads work best with it, so I decided to try some out. Do not confuse this with the Silhouette Mint stamp making machine and its materials, I don't have one of those.
First a few words about the stamp material. It is a sort soft flexible plasticy stuff, possibly silicone. Its a bit like the stuff silicone baby bottle teats used to be made of. It is a bit like the stuff clear acrylic stamps are made off, but it is much softer and not quite as clear.
Anyway, there is a tutorial on how to use it here at the Silhouette School blog, so I'm not going to present one here. The comments are worth reading too. http://www.silhouetteschoolblog.com/2014/09/silhouette-stamp-material-tutorial-10.html
Silhouette recommend that cuts in the stamp material are 1/16 of an inch apart, that is about 1.5mm here in Australia. So much craft information is from the US that its hard to use metric for everything as I would like to. This width means you can't do small writing or anything like that.
I decided to make the flower that's on the box of the Starter Kit first. The box has a somewhat misleading picture on it, I mean the inked-up black flower on the grid on the left. The one to the right is a better indication of what the stamp is like.
I made the flower but there was some problem with alignment and one side of the flower was not cut. When I find out why I will post the information here.
I found the stamped image a bit disappointing, that led me to do some experiments and gave me something to blog about.
First a few words about the stamp material. It is a sort soft flexible plasticy stuff, possibly silicone. Its a bit like the stuff silicone baby bottle teats used to be made of. It is a bit like the stuff clear acrylic stamps are made off, but it is much softer and not quite as clear.
Anyway, there is a tutorial on how to use it here at the Silhouette School blog, so I'm not going to present one here. The comments are worth reading too. http://www.silhouetteschoolblog.com/2014/09/silhouette-stamp-material-tutorial-10.html
Silhouette recommend that cuts in the stamp material are 1/16 of an inch apart, that is about 1.5mm here in Australia. So much craft information is from the US that its hard to use metric for everything as I would like to. This width means you can't do small writing or anything like that.
I decided to make the flower that's on the box of the Starter Kit first. The box has a somewhat misleading picture on it, I mean the inked-up black flower on the grid on the left. The one to the right is a better indication of what the stamp is like.
I made the flower but there was some problem with alignment and one side of the flower was not cut. When I find out why I will post the information here.
I found the stamped image a bit disappointing, that led me to do some experiments and gave me something to blog about.
Subscribe to:
Posts (Atom)